
Use this LED current calculator to pick a series resistor or check the current through a resistor you already have.
Advanced options
Table of contents
How to use our LED Current Calculator
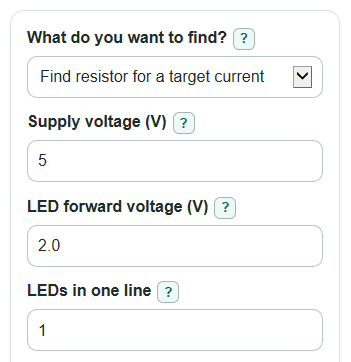
- Choose What do you want to find? based on your job: a resistor for a target current, or the current from a resistor you already have.
- Enter Supply voltage (V), LED forward voltage (V), and LEDs in one line for the one LED path you are building.
- Enter Target LED current (mA) in resistor mode, or Resistor you have (ohm) in current mode.
- Open Advanced options if you want standard resistor rounding, a wattage safety factor, or a low-to-high current range using LED voltage and resistor tolerance.
- Check that LED current or Actual current with selected resistor is below your LED's datasheet limit, and that Suggested resistor wattage is not larger than the part you plan to use.
Definitions
Supply voltage (V): The voltage from the battery, power supply, or logic pin before the LED and resistor.
LED forward voltage (V): The voltage used by one LED while it is lit in the forward direction.
LEDs in one line: The number of LEDs wired end-to-end in the same current path.
Target LED current (mA): The current you want through the LED path, measured in milliamps.
Resistor you have (ohm): The resistance value of the physical resistor you plan to use.
Voltage across the resistor (V): The supply voltage left after subtracting the LED voltage. This voltage sets the current through the resistor.
Heat in the resistor (W): The electrical power the resistor must turn into heat.
Suggested resistor wattage (W): A practical resistor power rating at or above the calculated heat times the Wattage safety factor.
Resistor tolerance (percent): The allowed percent difference between the printed resistor value and its real value; a 5 percent resistor can be a little high or low [3].
Standard resistor set: A group of common resistor values, such as E12, E24, or E96, used when the exact math result is not a part you can buy or pick from a kit.
Common mistakes and quick fixes
Mistake: Using total battery pack voltage incorrectly in Supply voltage (V).
Fix: Enter the voltage that is actually across the LED and resistor path, such as 5 for a 5 V Arduino pin or 9 for a 9 V battery.
Mistake: Guessing LED forward voltage (V) without checking the LED type.
Fix: Use the datasheet value when possible; if you only have a color hint, treat the result as an estimate and use the Lowest LED forward voltage (V) and Highest LED forward voltage (V) range check.
Mistake: Putting the total number of parallel LEDs in LEDs in one line.
Fix: Count only LEDs wired end-to-end in the same path. For side-by-side LED paths, run a separate calculation for each path and use one resistor per path.
Mistake: Entering Target LED current (mA) in amps, such as 0.02 instead of 20.
Fix: Enter milliamps in Target LED current (mA). For example, 20 mA is 0.020 A.
Mistake: Ignoring Suggested resistor wattage after choosing Resistor you have (ohm).
Fix: Compare Suggested resistor wattage with the printed or known wattage rating of your resistor. A higher wattage rating is okay.
Mistake: Leaving Resistor tolerance (percent) filled with a bad value, such as 100 or text.
Fix: Enter a number from 0 to under 100, such as 5, or leave Resistor tolerance (percent) blank to skip the current range.
Limitations & Key Assumptions / Boundary Conditions
- The calculator uses a simple series LED plus resistor model. It does not model LED temperature changes, pulse driving, PWM brightness, or battery voltage sag.
- Supply voltage must be higher than the total LED forward voltage. If it is not, this resistor method cannot set a useful forward current.
- LED forward voltage is not fixed. It changes with LED color, current, temperature, and part variation, so the range check is only an estimate.
- For parallel LED paths, do not share one resistor calculation across all paths unless the circuit is designed for that. A beginner-safe choice is one resistor per LED path.
- Suggested resistor wattage uses the listed common wattages: 0.125, 0.25, 0.5, 1, 2, 3, 5, and 10 W. Real part availability depends on resistor type and package.
- Standard resistor rounding assumes the selected E-series values across decades. Exact value only means no rounding is applied.
- The current range uses only resistor tolerance and optional LED voltage min/max. It does not include supply tolerance unless you change Supply voltage (V) yourself.
Methodology
Core calculation
The calculator first finds the total LED voltage for the one series path.
V_led_total = LEDs in one line * LED forward voltage (V)
Then it finds the voltage left across the resistor. A resistor reduces current by dropping voltage across its terminals, which is the basic Ohm's law idea used here [2].
V_resistor = Supply voltage (V) - V_led_total
If V_resistor is zero or negative, the supply is not high enough for the entered LED path in this simple calculation.
Find resistor mode
In resistor mode, Target LED current (mA) is converted to amps, then resistance is found from voltage divided by current.
R_exact = V_resistor / (Target LED current (mA) / 1000)
If Standard resistor set is E12, E24, or E96, the calculator rounds the exact value to a standard value. Round up chooses the next value at or above the exact resistance, which usually lowers current. Pick the closest value chooses the nearest standard value, which can make current a little higher or lower.
R_selected = next_value_at_or_above(R_exact, selected set) for round up
R_selected = closest_value(R_exact, selected set) for closest
The calculator then recalculates the real current through that selected resistor.
Actual current with selected resistor = (V_resistor / R_selected) * 1000
Find current mode
In current mode, the entered Resistor you have (ohm) is used directly.
LED current (mA) = (V_resistor / Resistor you have (ohm)) * 1000
Heat and wattage
Resistor heat is calculated from resistor voltage times current in amps.
Heat in the resistor (W) = V_resistor * (LED current (mA) / 1000)
The wattage recommendation multiplies that heat by Wattage safety factor, then picks the next common wattage at or above the needed value.
P_needed = Heat in the resistor (W) * Wattage safety factor
Suggested resistor wattage (W) = next common wattage at or above P_needed
Range check
When Resistor tolerance (percent), Lowest LED forward voltage (V), and Highest LED forward voltage (V) are usable, the calculator estimates a low-to-high current range. The lowest current uses the highest LED voltage and highest resistor value. The highest current uses the lowest LED voltage and lowest resistor value.
Lowest estimated current = ((Supply voltage (V) - LEDs in one line * Highest LED forward voltage (V)) / (R_used * (1 + tolerance / 100))) * 1000
Highest estimated current = ((Supply voltage (V) - LEDs in one line * Lowest LED forward voltage (V)) / (R_used * (1 - tolerance / 100))) * 1000
Mini-example
For a 5 V supply, one 2.0 V LED, and a 20 mA target, the resistor voltage is 3 V.
R_exact = 3 / (20 / 1000) = 150 ohm
Heat = 3 * (20 / 1000) = 0.06 W
With a 2 times Wattage safety factor, the needed rating is 0.12 W, so the suggested common wattage is 0.125 W.